
 cs
cs 

When a maintenance technician records the monthly inspection of a stored-pressure dry chemical extinguisher, the most common checklist items are the pressure gauge, the safety pin, and the tamper seal. Those three get checked every time because they are visible without opening anything. Yet when an extinguisher actually fails to operate, or leaks, or discharges incorrectly, the cause is usually deeper inside the valve, the hose, or the tube that carries the agent to the outlet. Understanding fire extinguisher replacement parts means looking past the visible checklist items and understanding the whole pressure-containing and flow-controlling circuit that sits between the operator's hand and the fire.
That understanding has direct purchasing and safety consequences. Buying a replacement gauge that has the wrong thread pitch or a different port depth will cause a leak. Installing a dry chemical hose with a thinner wall can allow the agent to escape under pressure. Fitting a CO2 horn that is not rated for the cylinder's discharge temperature can cause brittle cracking and an unpredictable discharge pattern. These are not hypothetical concerns; they are the kind of field failures that service providers and quality engineers deal with regularly. The goal of this article is to give maintenance teams, safety officers, and equipment buyers a practical map of the replaceable parts, the failure modes to look for, and the selection criteria that keep a repaired extinguisher as safe as a new one.
A useful way to think about replacement parts is to divide them into two groups. The first group contains pressure-retaining components: the valve body, the gauge, the hose connections, and the seals that prevent leakage. The second group contains actuation and delivery components: the handle, the stem, the safety pin, the hose, the nozzle, and the siphon tube. Some parts appear in both groups because they perform both functions. The valve assembly, for example, retains internal pressure, controls discharge, and carries the operating mechanism. This is also why the valve is usually the most expensive and the most safety-critical single replacement part.
The Core Set of Fire Extinguisher Replacement Parts
When a manufacturer lists spare parts for a fire extinguisher, the exact set varies slightly by extinguisher type and standard. A CO2 unit, for example, typically does not use the same style of siphon tube as a dry powder unit, and cartridge-operated models may not have a pressure gauge because the agent is stored at atmospheric pressure in the main shell. A foam unit uses a different pick-up arrangement than a dry powder unit. Despite those differences, the following table gives a clear view of the commonly available replacement parts that apply across most categories.
| Replacement Part | Primary Function | Typical Failure Condition |
|---|---|---|
| Valve assembly | Seals the cylinder, opens on actuation, controls discharge | Thread wear, body cracks, seat leakage, stem seal leaks |
| Pressure gauge | Shows internal pressure status of stored-pressure units | Stuck needle, broken lens, false zero, corroded case |
| Discharge hose and nozzle | Directs agent from the valve to the fire | Kinking, cracks, blocked orifice, coupling thread damage |
| CO2 horn assembly | Slows and shapes CO2 discharge to avoid static buildup | Frost cracks, brittle plastic, missing swivel, loose fit |
| Siphon tube | Carries liquid or powder from the bottom of the cylinder | Bending, corrosion, blockage, shortened length |
| Safety pin and tamper seal | Prevent accidental discharge during storage | Missing, bent pin, broken seal, corrosion in the pin hole |
| Handle and lever | Actuates the valve stem when squeezed | Bending, cracking, rust at pivot point, loose rivet |
| O-rings, gaskets and static seals | Prevent leaks at the gauge port, hose connection and valve neck | Flattening, cuts, hardening, extrusion, chemical attack |
One important point about this list is that the pressure vessel itself is not a replacement part. In most jurisdictions, the cylinder is the certified pressure container; if it loses integrity, the entire unit must be replaced rather than repaired. This distinction prevents a service technician from thinking that a dented or corroded shell can be restored by welding or patching, which is never an acceptable practice for a fire extinguisher. A related part that occasionally appears in replacement catalogs is the instruction nameplate. Replacing a worn label is a legitimate part of maintaining the unit because the label carries the operating instructions, rating, and certification markings that are required for compliance.
Valve Assembly: The Safety-Critical Component
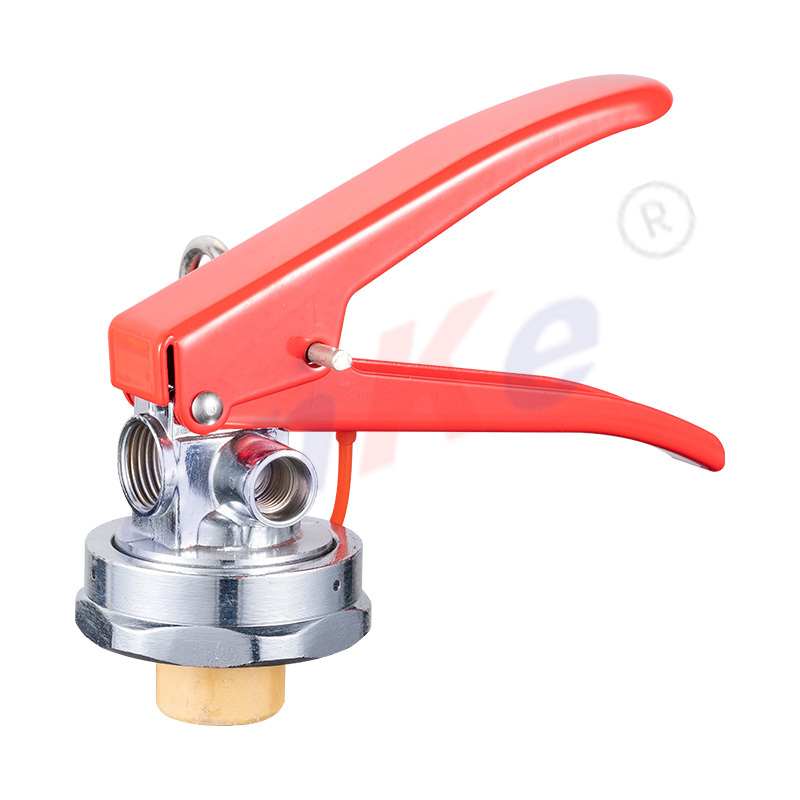
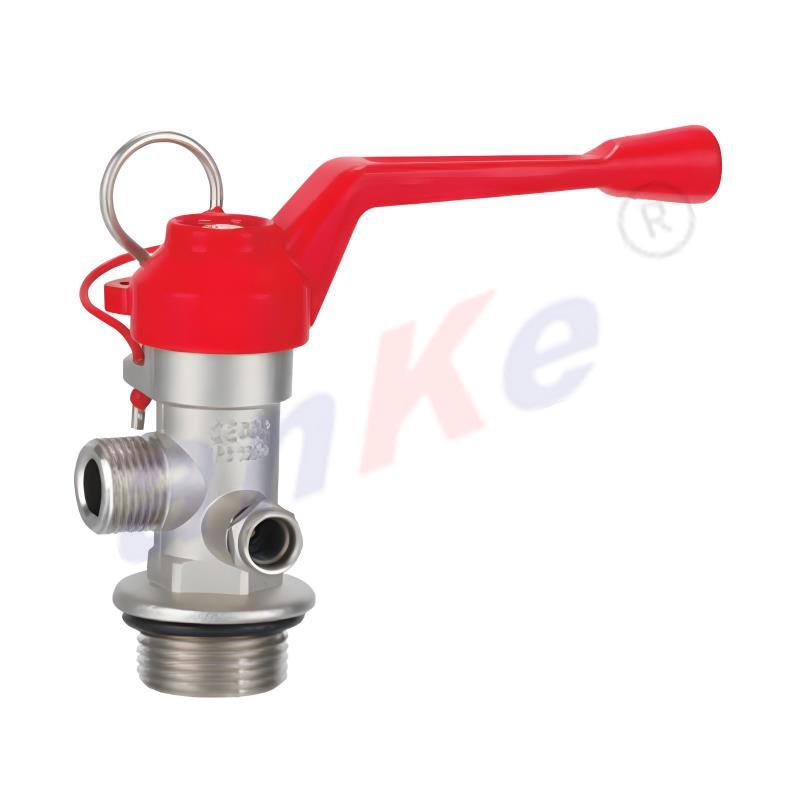
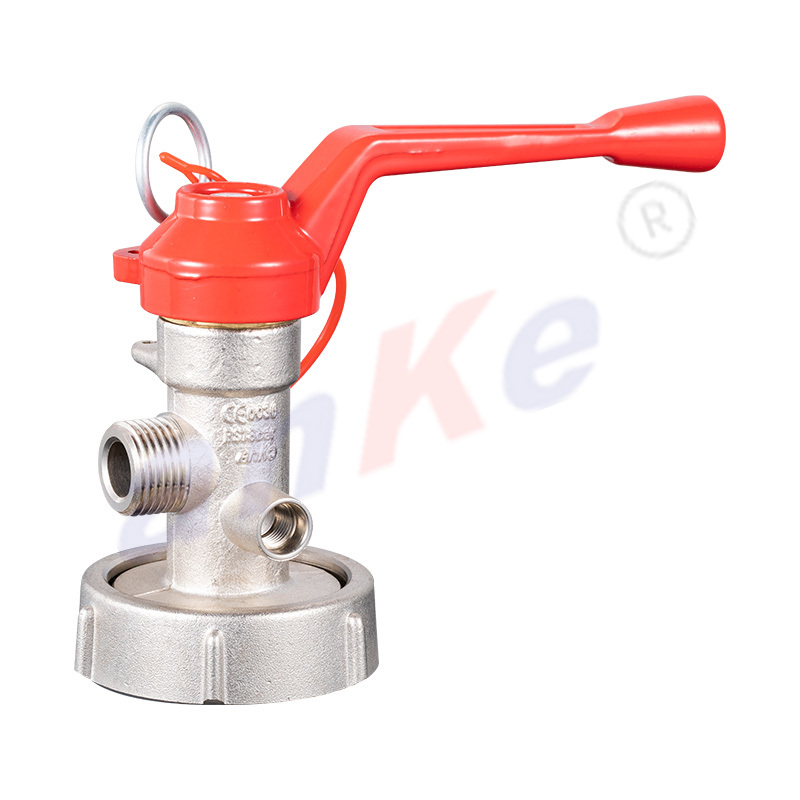
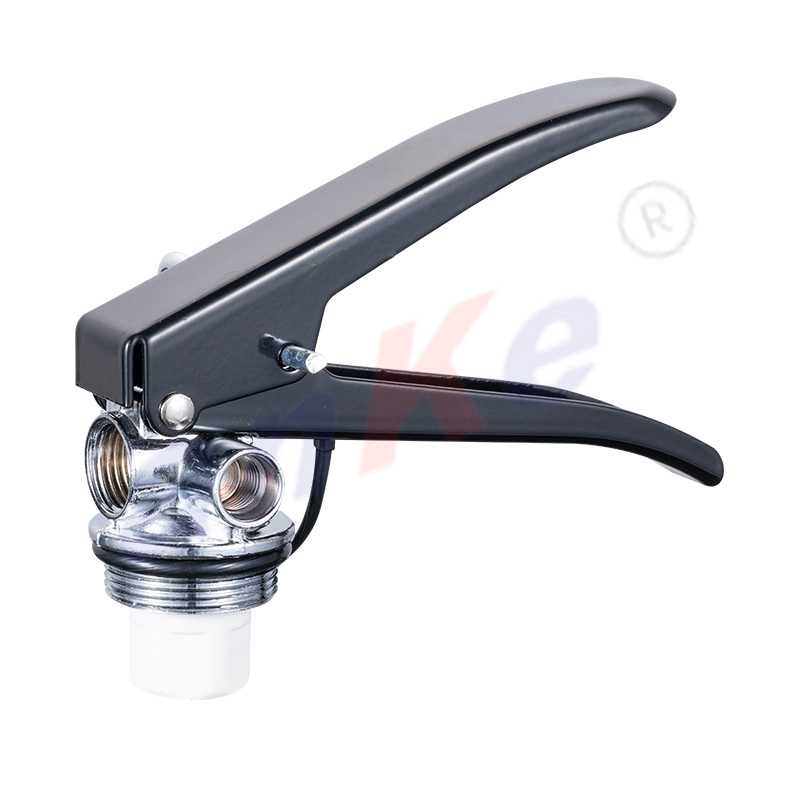
The valve is the heart of the fire extinguisher. It holds the pressurized agent inside the cylinder during storage, releases it when the operator actuates the handle, and, in many designs, allows the operator to stop the flow by releasing the handle. The valve body also provides the mounting point for the hose, the gauge, and in some models the safety pin and the retaining mechanism. Because it is both a pressure-containing part and a flow-control mechanism, the valve has more failure modes than any other component.
From a replacement perspective, a valve can fail in several distinct ways. Thread wear or galling on the neck fitting prevents a secure connection to the cylinder. Cracks in the valve body usually come from over-torque, material fatigue, or impact during handling. Seat damage allows continuous leakage past the sealing surface, which shows as a slow pressure drop even when the handle is not pressed. Stem seal degradation causes leakage around the operating stem, often seen as powder residue or moisture on the exterior. Spring fatigue can prevent the valve from snapping back into the closed position after discharge, which is dangerous because the unit will continue to empty.
When any of these conditions is present, the correct action is to replace the entire valve rather than attempt an internal repair. Replacement valves come pre-assembled with their stem, spring, and seat components, and are pressure-tested by the manufacturer. Field disassembly of a valve is both difficult and inconsistent with the approval requirements of most certification bodies. The exact replacement valve must match the extinguisher model, the agent type, and the neck size and thread standard of the cylinder.
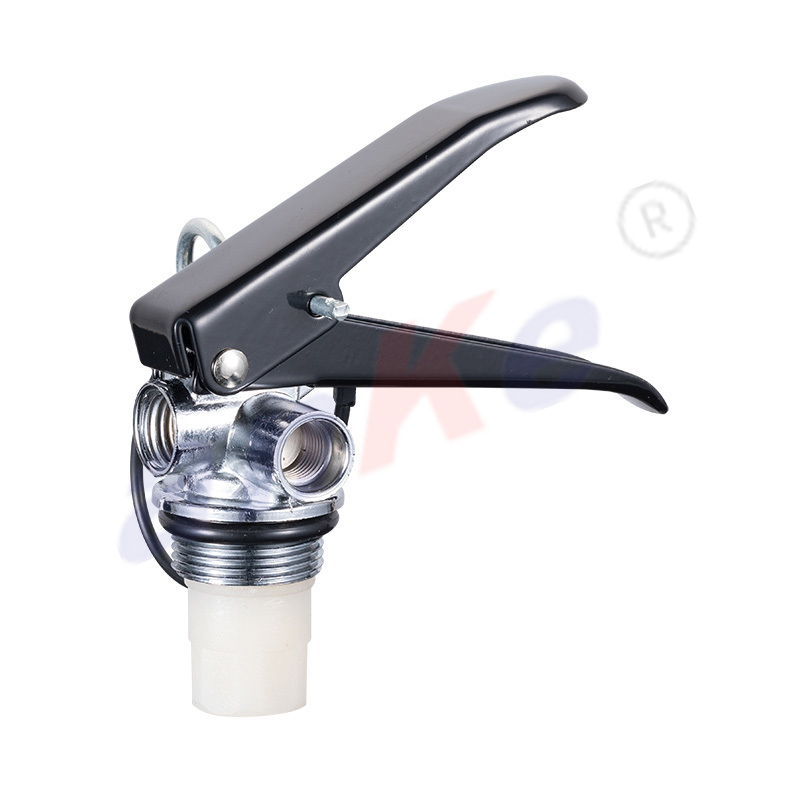
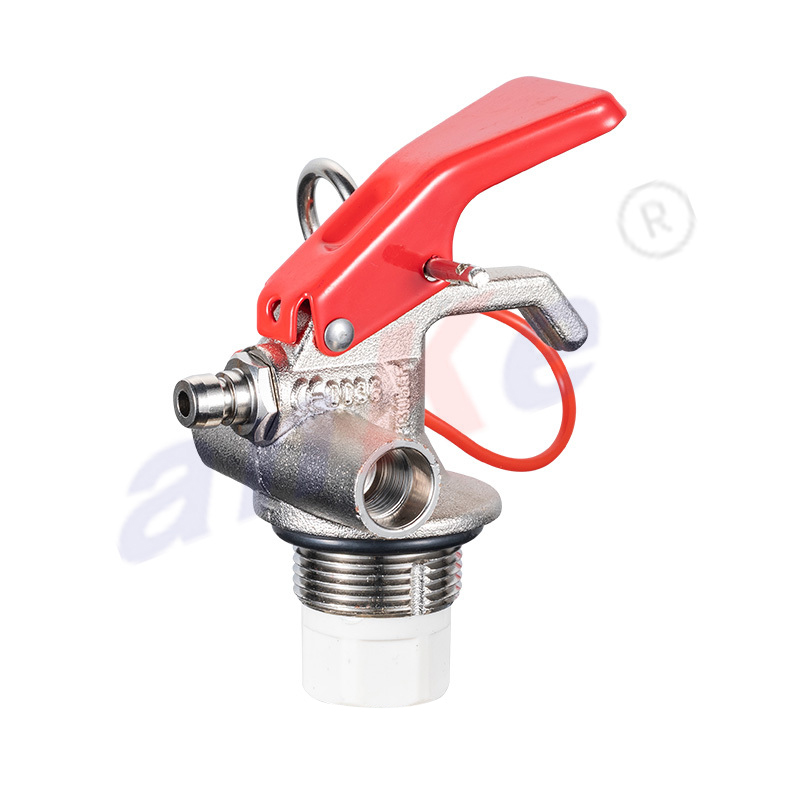
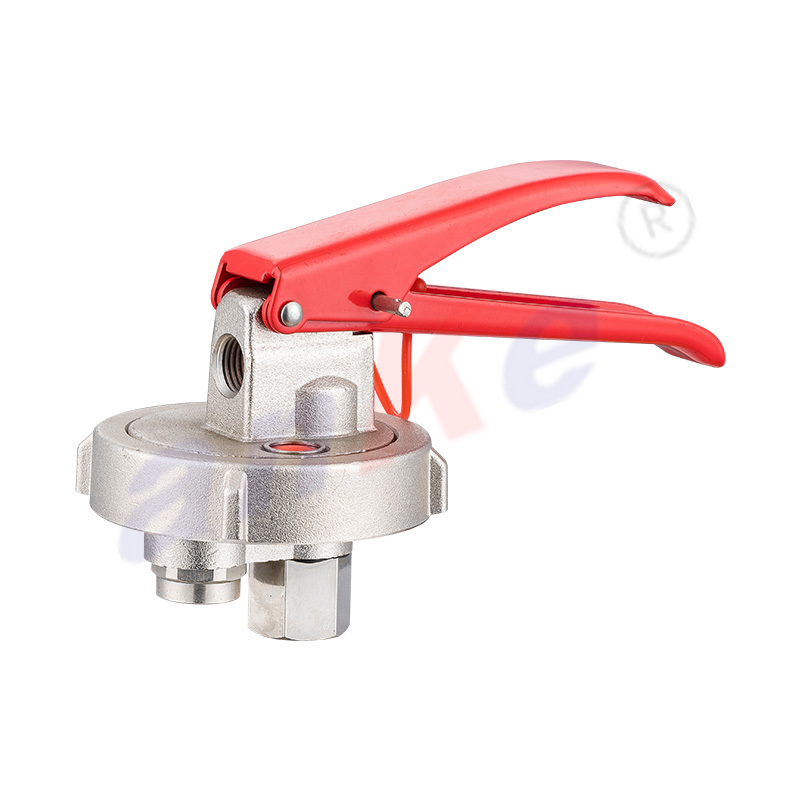
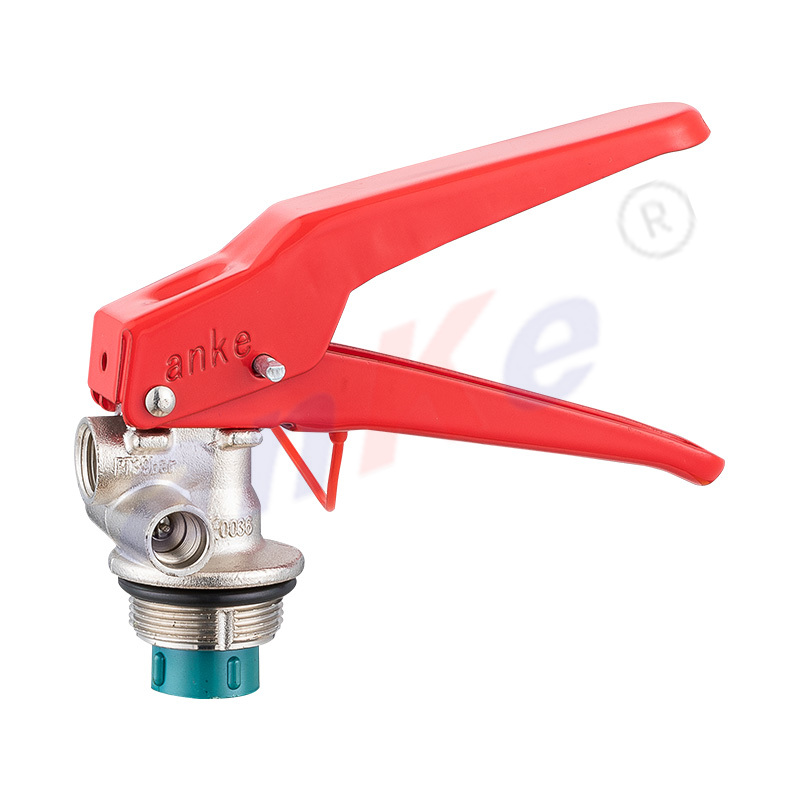 4-12KG Dry Powder Fire Extinguisher Valve with Brass ConstructionThis pre-assembled valve is a direct replacement for dry powder extinguishers when seat leaks or stiff handles indicate worn internals. Its brass body resists corrosion and it matches the cylinder neck thread, supporting safe, certified discharge performance.View Product →
How Valve Failures Appear in Service
The most common early indication of valve trouble is a pressure gauge reading that drops steadily over several weeks. That tells you the agent is escaping somewhere, and the valve seat is one of the first places to check. A second sign is the presence of powder or liquid residue around the handle or at the base of the valve body, which suggests a damaged stem seal. A third sign appears during a discharge test: if the valve hisses but the flow is weak, or if the handle feels stiff and does not return automatically, the internal components are worn.
Valve Material and Configuration Choices
The choice of valve body material matters for corrosion resistance, strength, and weight. Brass is common for dry powder, water and foam valves because it machined cleanly and resists corrosion in normal indoor conditions. Copper and stainless steel are often used for CO2 units, where the valve must withstand high pressure and very low discharge temperatures. Aluminum alloy valves are lighter and appear on many portable dry powder units, but they require proper surface treatment to avoid galvanic corrosion where the valve meets the steel cylinder neck. The engineering differences between squeeze-grip and pinch-style actuators matter as well, because the operator's hand strength must be sufficient to hold the valve open throughout discharge. See our comparison of fire extinguisher valves with squeeze and pinch handles to understand the operational trade-offs before you order a replacement.
Pressure Gauges: Interpreting the Only Live Status Display
For a stored-pressure fire extinguisher, the pressure gauge is the only continuous indication that the unit is still ready for use. A properly functioning gauge allows an inspector to confirm at a glance that the pressure is inside the marked operating band. But a gauge is a mechanical instrument, and its internal movement can fail without any visible damage to the outside. That is why replacing the gauge on the basis of test results, not just visual appearance, is the correct professional practice.
Reading the Gauge Correctly
Most stored-pressure extinguishers use a gauge with colored bands. The green zone is the normal operating range. The red zones at the extremes indicate overpressure and underpressure. A needle that sits in the lower red zone means the unit has lost pressure and will not discharge effectively. A needle that sits in the upper red zone can indicate overcharging or exposure to heat, which raises the burst risk. Either condition requires the unit to be removed from service. The appropriate action depends on the root cause, which should be diagnosed before simply swapping in a new gauge.
When a Gauge Must Be Replaced
A gauge should be replaced when the needle does not respond to pressure changes, when the glass is cracked or clouded badly enough to obscure the markings, when moisture has entered behind the lens, or when the fitting threads are damaged. A gauge that pegs to zero even though the cylinder is clearly under pressure should be checked against a calibrated reference gauge before being discarded, because the problem may actually be a completely empty cylinder rather than a faulty gauge. A gauge that reads in the green while a calibrated reference gauge reads low is even more dangerous, because it creates a false sense of safety.
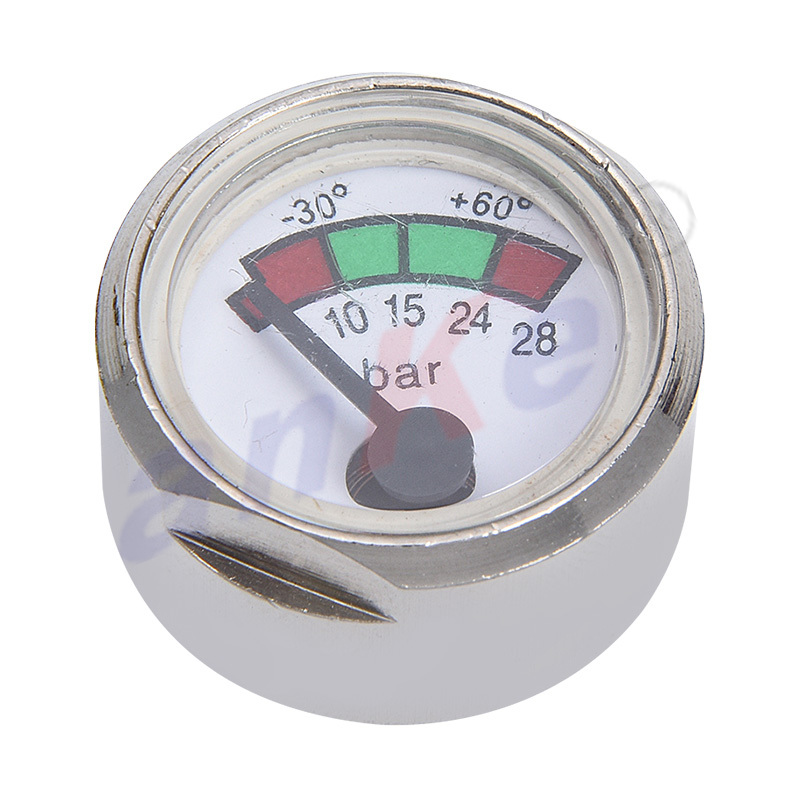 Fire Extinguisher Imitation Pressure Gauge for Readiness ChecksWhen a gauge needle fails to respond or the lens is damaged, this replacement helps verify cylinder status. It suits industrial, commercial, and home units, offering corrosion-resistant materials and easy installation without special tools, though CO2 extinguishers should use weighing instead.View Product →
Manufacturers also note that CO2 fire extinguishers do not normally use a pressure gauge. Because CO2 cylinders are always at their vapor pressure for a given temperature, the correct readiness check is weighing the unit against its tare weight, not reading a gauge. Attempting to install a gauge on a CO2 unit is both unnecessary and potentially dangerous, because the cylinder is not designed with a gauge port. Our detailed guidance on fire extinguisher pressure gauges explains how to distinguish a false low reading from a real pressure loss and when a gauge is actually serviceable.
Discharge Hose, Nozzle and CO2 Horn
The hose and its outlet component form the delivery path for the extinguishing agent. On dry powder, water, and foam units, the outlet is usually a short plastic or rubber hose with a nozzle, designed to direct the stream at the base of the fire. On CO2 units, the outlet is a horn assembly that controls the velocity of the gas and prevents a high-speed jet from spreading burning material. The two types of outlet components are not interchangeable, and each has its own replacement logic.
Dry Chemical, Water and Foam Units
For these extinguishers, the discharge hose is exposed to the agent during every use and to the environment during storage. The most common failure is cracking of the outer cover, which can begin as surface crazing and turn into a through-wall split. A hose that is kinked or flattened under the cabinet mount can internally delaminate, restricting flow even when the exterior looks normal. Coupling threads also wear from repeated removal and reinstallation. When replacing the hose, check the nozzle as well, because a partially blocked orifice changes the discharge pattern and reduces the effective range of the unit.
CO2 Horn Assembly
The CO2 horn is designed for the extremely low temperature that occurs when liquid CO2 expands through the discharge system. A horn made from the wrong polymer, or one that has been mounted incorrectly, can crack during a discharge event. The horn assembly also includes the swivel or connection piece that attaches to the valve outlet. If the swivel does not rotate freely, the operator may struggle to direct the discharge, so the swivel should be evaluated at the same time as the horn itself. Replacing a CO2 horn is a simple procedure, but matching the thread type and the rated size to the valve outlet is critical for a leak-free fit.
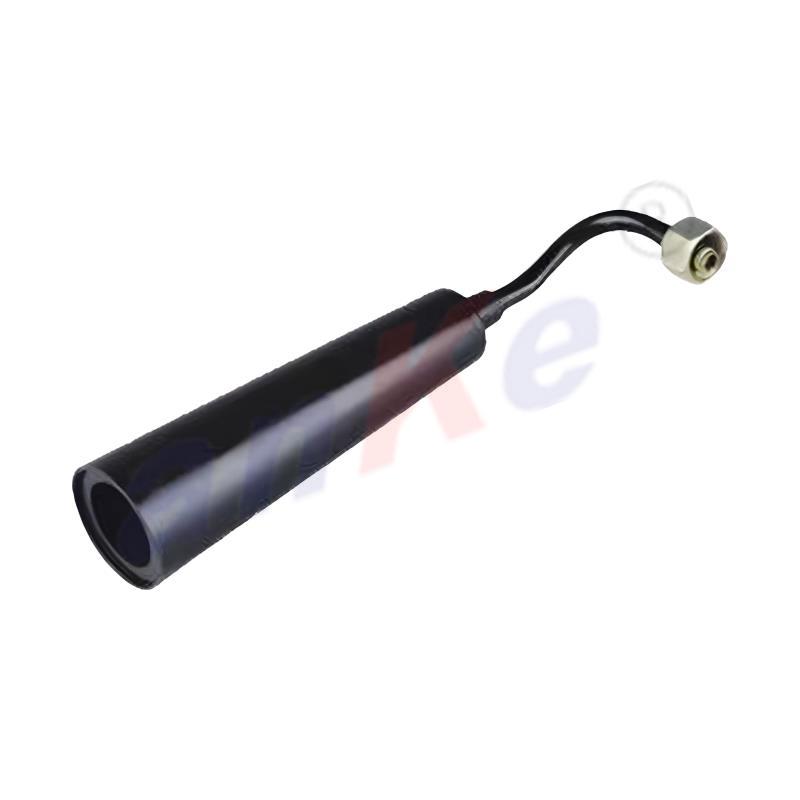 2KG CO2 Horn with Swivel Bend and W21.8x14 ThreadThis 320mm horn with a rotating swivel replaces damaged assemblies, providing a safe standoff distance and flexible spray direction. Its W21.8x14 thread ensures a leak-free fit on compatible CO2 valves, and it is rated for the low temperatures of discharge.View Product →
In industrial settings, the horn and hose assembly is sometimes worn by rubbing against racking, vehicle mounts, or cabinet edges. Even a small surface abrasion can create a stress point that fails later under discharge pressure. A practical habit is to rotate the horn and flex the hose slightly during inspection to expose hidden cracks.
Siphon Tubes and Pick-Up Tubes
The siphon tube, also called a pick-up tube or eductor tube, runs from the valve down into the body of the extinguisher. Its job is to carry the extinguishing agent from the bottom of the cylinder upward into the valve when the unit is discharged. Without a properly working siphon tube, a stored-pressure extinguisher will expel only the gas above the agent and then stop, leaving almost all of the extinguishing material in the cylinder.
Several conditions can make a siphon tube unsafe or ineffective. A tube that is too long will sit on the bottom of the cylinder and crush under the valve during installation, restricting flow. A tube that is too short will leave a gap below it, so a percentage of the agent can never be discharged. Cracks in the tube can allow gas to bypass the agent, which causes sputtering and weak delivery. For dry powder units, a corroded or ragged tube interior can collect powder clumps, especially if the extinguisher has been stored in a humid environment. For water and foam units, the pick-up tube may contain a strainer or filter screen that must be cleaned or replaced if it becomes clogged.
When ordering a siphon tube, the critical measurements are the overall length, the inside and outside diameters, and the thread or barb configuration that connects to the underside of the valve. Extinguisher shells have slightly different internal heights, and using a tube from a different model than the one being serviced is a common source of hidden problems. It is always safer to order a siphon tube specifically matched to the valve model and the cylinder capacity.
Safety Pins, Tamper Seals and Operating Handles
These are the visible parts that an inspector checks first, and they are also the least expensive components on any fire extinguisher. Despite their simple appearance, they perform a critical safety function. The safety pin prevents the handle from being pressed accidentally, and the tamper seal proves that the pin has not been withdrawn since the last inspection. A missing safety pin is an immediate defect, because a unit without a pin can discharge if it is bumped, dropped, or struck by a passing cart.
The safety pin should be replaced if it is bent, hard to pull, or has lost its spring retention. The tamper seal should also be replaced with every maintenance action that requires withdrawing the pin, because a broken seal signals to the next inspector that the unit may have been partially discharged or tampered with. Some pins include a small ring that fits over the handle; if the ring is deformed, the pin may bind during removal, costing valuable time in an emergency.
The operating handle and lever assembly is another component that receives heavy load during discharge. Handles can bend if the operator squeezes very hard or uses a tool to increase the grip force. A bent handle may not fully actuate the valve, or it may hold the valve partially open after the operator releases it. Loose rivets at the pivot point can cause the handle to wobble, making the valve response unpredictable. In cold environments, plastic handles can become brittle and crack under impact. Replacing a handle is straightforward, but the new handle must match the valve model's geometry, because the length of the handle determines the mechanical advantage applied to the valve stem.
O-Rings, Gaskets and Static Seals
The smallest replacement parts are often the ones that cause the most frustrating problems. O-rings and gaskets are used at the gauge port, the hose connection, and the valve-to-cylinder neck interface. When these seals harden, flatten, or crack, they allow slow leaks that may not be noticed until a pressure check fails. Temperature swings accelerate seal degradation, which is why extinguishers mounted near heaters or in uninsulated vehicle cabs tend to develop leaks sooner than units kept in stable indoor conditions.
Material selection for replacement seals is important. EPDM has good ozone resistance and is widely used in dry powder units. Nitrile offers good oil resistance for industrial environments. Silicone can handle a wider temperature range but may have lower abrasion resistance. When ordering a replacement seal, it is not enough to match the diameter; the cross-section shape and hardness must also match the original design. A slightly thinner O-ring may seat initially but can extrude under pressure, causing a leak later. A slightly harder one may not compress enough to fill the groove. Manufacturers produce seals specifically for each valve family, and using a generic assortment kit from a hardware store is not a reliable approach for a pressure-retaining safety device.
Inspection Signs That a Part Must Be Replaced
If there is a practical rule for knowing when to replace a fire extinguisher part, it is this: replace any component that shows a deviation from its original geometry, material integrity, or operating behavior. A part does not need to be fully broken to be a liability. A hairline crack on a plastic horn, a slight flattening of an O-ring, or a gauge needle that hesitates before returning to zero are all early indicators of probable failure.
The chart below summarizes the parts that show the highest frequency of field replacement, based on typical examiner observations across many maintenance cycles.
Illustrative field replacement frequency based on typical inspection records; actual figures vary by environment, maintenance discipline, and unit age.
The following table translates common inspection findings into clear replacement actions.
| Observed Condition | Likely Cause | Action |
|---|---|---|
| Pressure gauge reads low, no visible leak | Failed gauge, valve seat leak, or loss of propellant | Weigh and test; replace gauge if valve holds pressure |
| Powder residue on handle or valve neck | Worn stem seal or internal leakage | Replace valve assembly |
| Hose surface cracked or stiff | Ozone and heat aging | Replace hose and inspect nozzle |
| CO2 horn has small cracks | Thermal cycling with frozen discharge | Replace horn assembly immediately |
| Safety pin missing or bent | Previous inspection oversight or tampering | Replace pin and install new tamper seal |
| Siphon tube visibly corroded or loose | Moisture inside cylinder, tube mismatch | Replace with matched tube and inspect agent condition |
These recommendations apply equally to a single extinguisher used in a home and to a large fleet managed by a professional service company. The cost of replacing a questionable part is always far less than the cost of discovering the failure while the fire is already burning.
Selecting Compatible and Compliant Replacement Parts
The process of choosing a replacement part can be divided into three steps: identify the exact model and standard of the existing unit, select the material and configuration that matches the application, and verify that the replacement part carries the correct certification markings for the relevant market. Skipping any of those steps can lead to a repaired extinguisher that looks correct but does not meet the required safety level.
Material Selection
Each material choice affects the service life and performance of the replacement part. The table below summarizes the common material families and their typical applications in fire extinguisher components.
| Material | Typical Components | Key Considerations |
|---|---|---|
| Brass | Valve bodies, gauge fittings, hose couplings | Good machinability, reliable sealing surface, moderate cost |
| Copper | CO2 valve bodies, horns | Excellent thermal conductivity, stable at low discharge temperatures |
| Stainless steel | CO2 valves, siphon tubes for aggressive agents | High corrosion resistance, higher cost, suitable for harsh environments |
| Aluminum alloy | Lightweight dry powder valve bodies | Weight reduction, needs protective coating to prevent galvanic corrosion |
| EPDM rubber | O-rings, hose liners, gaskets | Good ozone and weather resistance, wide temperature range |
| PVC / polyurethane | Discharge hoses, nozzles | Flexible and durable, check compatibility with the specific agent |
Thread Fit and Dimensional Standards
Thread compatibility is the most overlooked detail in replacement part selection. Extinguisher valves and cylinders are manufactured to a variety of national and regional thread standards. A valve that visually looks identical to the original may have a different thread pitch or form, which means it cannot be properly torqued to the cylinder neck. A gauge with the wrong thread will leak immediately or may even cross-thread and damage the port in the valve body. Before ordering, verify the cylinder neck specification, the valve outlet size, and the pressure gauge port configuration against the extinguisher nameplate and the manufacturer's datasheet.
Quality and Certification Considerations
Replacement parts for fire extinguishers are not commodities. Reliable component suppliers control the material batch, verify the heat treatment, and pressure-test every production run. The certification markings on the part are also part of the compliance chain; an inspector who examines a repaired extinguisher may check whether the replacement valve or gauge has the same certification mark as the original equipment. The most straightforward way to manage this risk is to buy replacement components from the original valve manufacturer or from an approved distributor that can trace the parts back to the production lot.
Replacement Procedures and After-Service Checks
Replacing a component is only half of the job. After any replacement, the unit must be rechecked so that the repair does not introduce a new fault. A properly serviced extinguisher should be leak-tested, weighed, and pressure-confirmed before it is returned to its mounting location. Most professional service facilities do this by installing the complete assembly and applying a leak check at the actuating seal and the gauge port. If a replacement valve was installed, the unit should be pressure-tested to the specified test pressure and observed for a defined period to confirm there is no pressure drop.
The torque applied during reassembly also matters. The valve-to-cylinder connection has a specified torque range. Too little torque allows leakage through the neck seal, and too much torque can distort the valve body or the cylinder neck. The gauge port, hose fitting, and plug have their own torque requirements. Using a torque wrench and confirming the values against the manufacturer's data is the only reliable method, because the feel of a human hand cannot be calibrated.
After the repair, the operator should verify that the safety pin is present and intact, the tamper seal is new, the handle moves freely, and the pressure gauge reads inside the green zone. A discharge test is not always required by regulations, but a function test of the handle and a leak check around the valve are reasonable minimum steps. If the unit was recharged with a new agent, the agent type and filled weight must match the nameplate rating.
Frequently Asked Questions
Can the valve on a fire extinguisher be rebuilt instead of replaced?
In most cases, replacing the complete valve assembly is safer and more reliable than rebuilding the internal components in the field. The valve contains the spring, stem, seat, and multiple seals that are individually calibrated during manufacturing. If one internal part has worn out, others are often close to the end of their life as well. A pre-assembled replacement valve is pressure-tested and carries a known performance standard, which makes the repair easier to document and verify.
Why does a new fire extinguisher part need to match the exact model?
Fire extinguishers are type-approved as complete units. The valve, gauge, hose, and tube are designed together to deliver the right flow rate, operating pressure, and discharge time. A part from a different model may fit physically but can change the discharge behavior, the pressure retention, or the drop test performance of the entire unit. Model matching protects the certification and keeps the repair within the approved design envelope.
How often should fire extinguisher replacement parts be inspected?
Monthly visual inspections should cover the gauge reading, safety pin, tamper seal, hose condition, and handle operation. Annual maintenance, performed by a qualified technician, should include disassembly, reconditioning or replacement of seals, and verification of the valve and gauge function. More frequent checks are appropriate in harsh environments such as marine decks, vehicle mounts, or outdoor storage where vibration, salt air, and temperature cycling accelerate wear.
Can a storage-damaged pressure gauge be repaired?
No. If moisture has entered the gauge, if the lens is broken, or if the movement is stuck, the gauge should be replaced rather than repaired. The internal assembly of a gauge is not field-serviceable in a practical sense, and any attempt to open it will void its calibration and certification.
Is it safe to use a generic hose or horn from a local supplier?
It depends on whether the generic part is actually dimensionally identical to the original and made from a material that is compatible with the agent. A hose that looks similar may have a different wall thickness, coupling geometry, or liner material. For a safety device, the cost savings from a generic part is rarely worth the risk of a poor fit or an untraceable material. Ordering from a known source with model-specific listings is the recommended practice.
What should be done with an extinguisher that has been discharged and needs a new valve?
A unit that has been discharged should be reconditioned by draining any remaining agent, disassembling the valve, inspecting the cylinder interior for corrosion, replacing the valve and any worn parts, recharging with the correct agent weight, and performing a leak test. If the cylinder shows corrosion, pitting, or damaged threads, the entire unit should be condemned rather than repaired.
Fire extinguisher replacement parts are not a list of generic hardware items. Each component carries a specific pressure rating, thread standard, material requirement, and certification marking that together determine whether a repaired extinguisher will perform in an emergency. The valve assembly, pressure gauge, discharge hose, nozzle or horn, siphon tube, pin and seal set, and handle mechanism all have clearly defined roles, and each one deserves the same level of care during selection and installation as the original equipment received at the factory.
For purchasing teams and maintenance departments, the most effective policy is simple: choose replacement parts that match the exact model and standard of the unit, inspect every component that is being reinstalled, and never reuse a seal, pin, or tamper strip that shows the slightest sign of deformation. When in doubt, replace the complete assembly and request the manufacturer's data to document the repair. That disciplined approach is what separates a fire extinguisher that merely looks ready from one that will actually work when the moment arrives.
 Phone: +86-13456107058/+86-15967800709
 Tel: +86-574-62010128/+86-574-62010688
 E-mail:
  Factory: Vesnice Huilong, město Huangjiabu, Yuyaocity, provincie Zhejiang, Čína





 Vedoucí domácího obchodu
 Manažer zahraničního obchodu
 VR Catalogue
